This Blog has “Potted-up”!

Hey everyone …

This blog has been moved to: www.growingwildseeds.com!

Growingwildseeds.com os a gardening blog and online resource for plant enthusiasts. Come check out upcoming gardening projects and tutorials, as well as useful plant care and gardening information!

Growing Wild Seeds

(I am in the process of moving my previous posts over to the new website, after which, I’ll be posting a bunch more and a lot  more frequently!)

Happy planting 🙂

Leave a comment

Filed under Gardening

How to grow a kiwi plant from seed

Kiwifruit is so tasty; it’s intoxicating.  All my life, I’ve enjoyed the unique flavour and texture of kiwis but never stopped to wonder where they come from and how they grow. It took 24 years, countless fruit salads, and the digestion of innumerous tiny black seeds before I thought about planting some.

After my first kiwi sprouts emerged from the soil, I did some research and realized that Canada, with its uncomfortably cold winters, is not an ideal environment for growing kiwi plants. While fairly hardy, kiwi cannot survive temperatures below -18 degrees celsius. This news didn’t; however, change my mind about continuing to care for my seedlings. I find watching their development fascinating and enjoy seeing them grow into beautiful little vines. Plus, judging by the way our climate has been changing in recent years, it may soon become possible for kiwi to survive a southern Ontario winter.

Whether you’re planting to observe or to consume, here’s how you can get growing your own kiwi vines:

Things you’ll need:

1) A kiwi. Try to get an organic kiwi in order to avoid the possibility that non-organic seeds may not reproduce as well. There are a few different types of kiwifruit in existence and this step-by-step method for sprouting should work for all varieties.

This is they type of kiwifruit I used!

2) A small mug or container. This will hold your kiwi seeds for their first week of germination.

3) Paper towels, a plate, and a clear plastic container. These will be used to construct a very simple mini greenhouse for germinating your kiwi seeds.

4) Potting soil. I would guess that any potting soil will do, but I suggest using one with a blend of peat, perlite, vermiculite, and organic fertilizer. Almost all of the seeds I planted in this type of certified organic potting mix have sprouted beautifully, so I think it’s fair to say that it works.

5) Containers/pots. A container (with drainage holes) that is 2-3” deep and an inch or two in diameter will be sufficient for sprouting; however, the seedlings will eventually need to be re-potted into larger containers in order to continue growing. The size of the container is up to you, but I suggest a rather large pot since kiwi vines get quite big and re-potting intertwined vines is not always a simple task.

6) Sun, or a grow light. Kiwi vines need lots of light, especially when sprouting. If you don’t have enough natural sunlight you will likely need to supplement some of it with a grow light.

Method for sprouting kiwi seeds:

1) Scoop some kiwi seeds out of your ripe, organic kiwifruit and clean them by rinsing off all of the fruit. I found that placing them in a small cup, adding water, swishing them around in it and then carefully straining the water out was the easiest way to accomplish this. Do this a few times until they are completely clean.

2) Fill your small mug or container with lukewarm water and add your kiwi seeds. Place them in a warm location, such as in front of a heater, on top of a computer, or on a warm window sill. Your kiwi seeds will remain in this water-filled mug until they start to open (for about one week), so I suggest changing the water once a day in order to avoid unwanted bacteria growth.

3) Once you can see the seeds beginning to open, it’s time move them to their mini greenhouse. Soak some paper towel with lukewarm water and place it on a plate. Distribute your germinating seeds on the paper towel, cover them with a plastic container and place them in a warm, sunny spot. (Make sure you poke some holes in the plastic container in order to allow for some airflow). Your seeds will sprout fast in these conditions. After only two days of life in their greenhouse, my kiwi seeds were ready for planting.

4) As soon as you’re seeds are sprouted, it’s time to plant. Before planting, always prepare your container well. Pre-moisten your potting soil by putting some soil into a bucket and mixing in some water until it is damp all the way through.

These little sprouts are ready for planting!

5) Fill your container with the pre-moistened soil. Leave about an inch of space below the rim of your container.

6) Plant your seeds! Sprinkle your seeds into one or more pots making sure they are at least a few inches apart. I suggest giving each seed its own small pot in order to make transplanting easier; however, I split seven sprouted kiwi seeds between two pots and they are all growing fine. Once they are in their pot(s), cover them with a thin layer of soil. I’ve read that all seeds should be planted at a depth of about twice their length, so you can imagine just how little soil is necessary to cover your kiwi seeds.

7) Once planted, water thoroughly with a squirt bottle or gentle watering can and place your pot or container in a warm, sunny, location (for some, this may mean under a grow light). If you feel that your house may be too cold or drafty for the little guys to continue germinating, cover the top of your pot(s) with clear plastic with holes punched into it and secure with an elastic band. This will continue the greenhouse effect and can be left on until you see your sprouts emerge from the soil.

These are the first two leaves of one of my sprouts.

These are the first two leaves of one of my sprouts.

Mature leaves take on a fuzzy texture and a brilliant lime-green colour.

8) Take care of your fuzzy babies and enjoy the process. Provide them with:

  • Water. Ensure that the soil is damp at all times, especially when your kiwi sprouts are young. Do not allow them to sit in a puddle of stagnant water though; those drainage holes are there for good reason.
  • Sunlight. Ideally, they should be placed in a warm sunny window where they will receive plenty of direct sunlight each day. If a consistently sunny window is not possible, supplement some sun for a grow light. Since Toronto rarely seems to get any sun in the winter, my sprouts reside under the warm rays of a grow light for 12 hours each day. Once they get a bit bigger, I will move them outside for the summer months.
  • Food. In order to keep your kiwi vines healthy and growing, the soil will eventually need to be replenished with nutrients. I suggest feeding it an organic fertilizer, such as compost or vermicompost, once it has developed a nice little set of leaves. Dig a little trench around the base of your vines, fill it with compost and water it well. Or, serve it up as compost tea. Try feeding your vines a few times each year or as needed, but do not overfeed! When it comes to fertilizing, less it best; so if in doubt, put it off a bit longer. (Another option is to start your seeds in potting soil with vermicompost or worm castings mixed into it).
  • Love. Spend some time looking at your fuzzy new friends. Get into the habit of watching for browning leaves and checking the underside of leaves for pests. Just like us, our plants can fall victim to bugs and disease and may sometimes require some extra love and affection.

4 Comments

Filed under DIY, Gardening, organic

How to grow a lemon tree from seed

When life gives you lemons, grow trees!

If you’ve ever seen a flowering lemon tree, you’ll understand why. For those of you who haven’t, allow me explain. Their lush, dark green, oval leaves have a glossy texture that shimmers in sunlight. Their delicate white flowers bloom with a citrus fragrance and are soft to the touch. Their exotic nature provides an alluring quality. And, finally, they bear the exciting possibility of fruit!

Typically, lemon trees flourish outdoors year-round in hot, sunny regions, but they can also thrive indoors as edible houseplants in cold-season climates. At the organic food store where I work we have a healthy lemon cutting producing massive fruit in a garage setting all year. It makes for an impressive sight during the dead of a Canadian winter!

This is the little tree with big fruit in the shop I work at.

And while rooting cuttings is a sensible option for fast fruit, lemon tree cuttings are not readily available in many parts of the world. But lemons are another story. And although it may take anywhere from 3-6 years for your tree to be capable of producing fruit, there is something extra rewarding about starting from seed. I currently have six strong little seedlings on the go, all of which were germinated in the middle of winter with very little effort. Watching them grow has been an exciting and fascinating experience and I know the best is yet to come.

Here is a step-by-step guide to growing your very own lemon tree from seed:

Things you’ll need:

1. A lemon. Make sure you purchase an organic lemon since some non-organic lemon seeds may be “duds”, incapable of germinating. Any organic lemon will do, but if you have climate or space restrictions, you may want to try looking for a specific variety called a “Meyer” lemon. Meyer lemons are a smaller type of lemon, often grown for ornamental purposes, and are thus better suited for indoor containers. I chose Meyer seeds for these reasons, but you can use any seed that makes sense for your situation.

This is a Meyer lemon!

2. Potting soil. I would guess that any potting soil will do, but I suggest using one with a blend of peat, perlite, vermiculite, and organic fertilizer. Every single one of the seeds I planted in this type of certified organic potting mix have sprouted beautifully, so I think it’s fair to say that it works.

3. Container/pot. A container (with drainage holes) that is 5-6” deep and a few inches in diameter will be sufficient for sprouting; however, the seedling will need to be re-potted into a much larger container. Mature lemon trees prefer a container that is wider rather than deeper, so I suggest planting your seedling in a pot that is 10-16” deep and 12-18” in diameter. Your baby tree will happily make itself at home in this larger container for the next few years, at which time you may want to upgrade again.

4. A grow light or lots of sun. Lemon trees need a lot of light, especially when they are sprouting and require 10-14 hours of it each day. If you don’t have a consistently sunny window (like me), get a grow light. They don’t cost much and will prove their worth in healthy green foliage.

Method for sprouting the lemon seed:

1. Pre-moisten your potting soil. Put some soil into a bucket and mix in some water until the soil is damp all the way through.

2. Fill your container with the pre-moistened soil. Leave about an inch of space below the rim of your container.

3. Slice open your lemon and choose a seed that looks completely full of life. Pop it into your mouth and suck on it until all the flesh is removed and the lemon flavour is gone. Do not allow the seed to dry out at any time. It needs to stay moist in order to germinate. I suggest keeping it in your mouth until you’re ready to plant.

4. Plant your seed! While it’s moist, plant your seed about 1/2″ below the soil level. Cover it completely with soil and water well with a squirt bottle or gentle watering can.

5. Cover your container with breathable plastic to keep your seeds warm and moist. I used a piece of clear garbage bag with holes poked into it and a rubber band to securely hold it in place.

6. Place the container in a warm location and observe for the next few days. Keep in mind: your seed needs warmth and moisture in order to germinate. Don’t allow the potting soil to dry out completely. Also take caution that you don’t cook your seed in its little greenhouse. Too much heat and moisture could lead to a rotten seed! You’re aiming to achieve a nice balance, so if you feel like the soil is warm enough without the plastic then it’s probably safest to remove it.

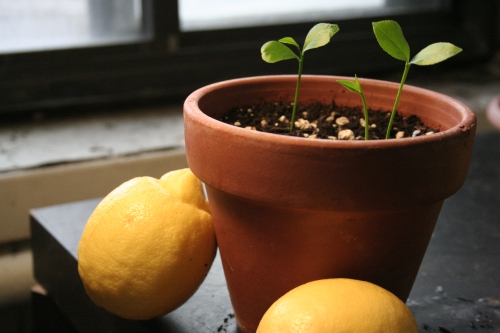
7. In about two weeks you may notice a sprout emerging from the soil. Once it appears, remove the plastic (if it’s still on) and place the little guy in a warm location with plenty of direct sunlight. Supplement sun with your grow light if needed.

Here are my little guys one month after planting.

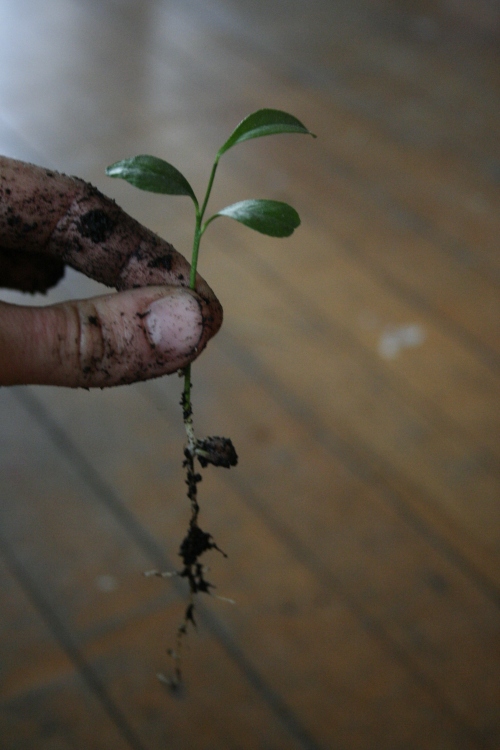
At a little less than two months old, this little guy is upgrading to a larger home.

8. Care for your new baby and watch it grow! Provide it with:

  • Water. Ensure that the soil is damp at all times, especially when your lemon tree is young. Do not allow it to sit in a puddle of stagnant water though; those drainage holes are there for good reason.
  • Sunlight. Place it in a warm sunny window where it will receive eight hours of direct sunlight each day, or supplement some sun for a grow light. Since Toronto rarely seems to get any sun in the winter, my sprouts reside in a well-lit window under the warm rays of a grow light for 12 hours each day.
  • Food. In order to keep your lemon tree healthy and growing the soil will eventually need to be replenished with nutrients. I suggest feeding it an organic fertilizer, such as compost or vermicompost, once it has developed a nice little set of leaves. Dig a little trench around the base of your tree, fill it with compost and water it well. Or, serve it up as compost tea. Try feeding it twice a year or as needed, but do not overfeed! When it comes to fertilizing, less it best; so if in doubt, put it off a bit longer. (Another option is to start your seed in potting soil with vermicompost or worm castings mixed into it).
  • Love. Spend some time looking at your new citrus friend. Pay attention to its growth. Feel it, talk to it, sing to it, but don’t try to dance with it. Get into the habit of watching for browning leaves and checking the underside of leaves for pests. Just like us, our plants can fall victim to bugs and disease and may sometimes require some extra love and affection.

Leave a comment

Filed under DIY, Gardening

DIY indoor vermicomposting

Vermicompost is a powerful, slow-releasing, organic fertilizer full of micronutrients and trace minerals. It is made by worms as they go about their daily lives aerating soil and fertilizing it with their excrement.

Conveniently, it’s also an easy method of composting that can be done indoors in small spaces, all year round!

I made my worm bin and began vermicomposting in my tiny bachelor apartment kitchen about one month ago. Since then, through experience and additional research, I’ve learned a lot about the process. So, I compiled a list of step-by-step instructions that will get you started on vermicomposting in your own space. The results are rewarding: synthetic fertilizer corporations will loathe your thrifty independence and your plants will thank you with growth spurts and blossoms!

Things you’ll need to make:

  1. Large, opaque storage container. This will be your worm bin (vermicompost bin). The size is up to you! The larger your bin, the more worms you can have and the more compost you’ll get. I used a big ol’ Rubbermaid (61x40x41.9 cm) because it fit perfectly under the island in my kitchen, and I plan on having a lot of plants!
  2. A plastic tray. This will sit underneath your worm bin. I used a plastic boot mat. Make sure you buy a boot mat that has the tallest walls possible since these will be catching any liquid that seeps out of the bottom of your worm bin.

    Plastic storage container (worm bin) and boot mat (drainage tray)

  1. A piece of window screen. This will sit inside the bottom of your worm bin to ensure that worms and large debris don’t find their way out of the drainage holes.

    Window Screen

  1. Two pieces of wood. They must be the same height and must also fit inside your plastic tray. Your worm bin will sit on top of them to allow space between the bin and the tray for moisture to drain out.

    Two pieces of wood to sit inside your plastic tray

  1. Newspaper. (You’ll need lots of it). This will be the cozy bedding for your new pet worms! I make sure to only use black and white newspaper because I’ve read on many websites that colour ink is toxic, and so if you’re growing any edible plants these chemicals can end up in your body later. If the season is right, dead leaves also make great worm bedding. They are a great natural source of carbon. Try mixing both newspaper and leaves!

    Newspaper

  1. A drill. This will be for making air holes in your worm bin. It will make clean, round, even holes. If you don’t have access to a drill, try using a screwdriver or try asking your neighbour. I asked mine 🙂

    A drill

  1. Worms! But not just your typical “lying out on the sidewalk on a rainy day” worms. The only type of worm suitable for your indoor vermicompost bin is called a “red wiggler” (Eisenia foetida). This species appreciates the warm environment and doesn’t have any qualms with living in its own feces. You can order red wigglers online or buy them at some bait shops, garden centres and worm farms. But first, try saving some money by asking around for someone who may have an excess of them (they can procreate quite rapidly). Or, try working for them. I got my worms at a local community greenhouse for just 2 hours of volunteer work!

Method for constructing the worm bin:

1.  Drill some 1/4 inch holes into the bottom of your worm bin. These will allow excess moisture to drain out so you don’t end up with worm stew. The number of holes is up to you, but don’t put too many or you’ll risk a weak bottom. I put 6 in mine.

2. Drill some more 1/4 inches holes into the sides of your worm bin. These are the air holes. Again, the number is your choice, but I suggest you give the little guys at least 20 of them. I put a total of 26 along the sides of my bin.

3. Line the inside bottom of your worm bin with the piece of window screen. I used some leftover pieces of screen to cover the air holes from the outside as well. It is a completely unnecessary step, but if you’re a bit obsessive and enjoy being prepared for unlikely scenarios (in this case: the worms escaping from the air holes), then you can do this too. I simply stuck the screen to the outside of the bin using hot glue around each hole.

Glue extra screen over the air holes on the ouside of your worm bin.

4. Put the lid on and stand your worm bin on top of the two pieces of wood placed inside the plastic tray. Voila! A miniature ecosystem awaits.

Ready for worms!

Now it’s time to make the bed…

How to prepare a bed for your worms:

1. Shred your newspaper into strips and small pieces. This task is kind of tedious so if you possess a paper shredder then you’re in luck! If you are using dead leaves, try to crunch them up as best you can; for example you could put them in a plastic bag and break them up with your hands or run over them with a car.

2. Pre-soak your shredded newspaper. Put it in a bucket, add water, and let stand for a half an hour or so.

3. Make the bed! One handful at a time, squeeze out excess water from the soaking newspaper and distribute it in the bottom of your worm bin. The newspaper should be damp, but not dripping water before it goes in. You don’t want to risk drowning the poor worms! Also try to “fluff” up the newspaper by ripping it some more to separate the pieces. If you find that it’s taking you a long time and the newspaper starts drying, moisten it with water in a squirt bottle. Fill your worm bin about halfway with bedding.

Now you’re ready to make poo!

Method for making poo (other than the one you already know):

1. Release your worms in their cozy new home. Make sure you locate their home in an area that will not get too hot or too cold. They may not survive temperatures lower than 50 degrees F and higher than 84 degrees F. Also ensure that their home will not be susceptible to drying out completely (direct sun all day) or to flooding (heavy rain).

2. Feed them your food scraps! Keep in mind that the smaller the food scraps, the faster your little workers will be able to transform them into brown gold. Put them through a blender first, or chop them up into smaller pieces. Also, try not to overfeed them. Too much food scraps in your worm bin will start to smell and attract unwanted insects and bacteria. I’ve read that they eat their body weight in food each day, so 1 lb of worms can consume about 1 lb of food in 24 hours. I suggest giving them a small amount at first and monitor how long it takes them to get through it in the following few days. Use your best judgement and only add more food scraps when you feel they can get through them in a reasonable time frame.

Inside the finished worm bin

What to feed your worms:

Nitrogen-rich foods

  • Fruit and vegetable scraps; cores and peels.
  • Coffee grounds (not too much) and tea (remove staple from the bag).
  • Eggshells (crushed)
  • Grass clippings

Carbon-rich foods

  • More newspaper
  • Dry grass
  • Hay and straw
  • Dead leaves
  • Paper egg cartons

How to harvest your vermicompost:

Depending on how many worms you have and how much bedding and food you’ve provided them, you may have a crop of usable fertilizer in just a few weeks or after a few months. When your worm bin contains lots of rich, dark brown sludge with few visible newspaper and food pieces, it’s probably harvest time.

1. Scoop all of the vermicompost over to one side of the worm bin.

2. Add new bedding and food scraps to the empty side.

3. Have patience. Wait a week or two. Your worms will make their way over to their new bed leaving behind all their hard work to your benefit.

4. Scoop the vermicompost out and make good use of it. Spread the new bedding around and start all over again.

What to do with your vermicompost:

  • Sprinkle them on the surface of the soil around your plants and give them a good watering. The nutrients will seep down to the roots where they are needed, and the layer will act as mulch helping to keep the soil moist.
  • Blend vermicompost into regular potting soil. Try mixing 30% vermicompost with 70% potting soil.
  • Make worm poo tea. Steep some vermicompost (in a tea bag or in the foot of an old pair of pantyhose) in tepid water for about 24 hours. Dilute to 1 part poo tea and 1 part water and treat your plants to a drink of the nutritional brew. Similarly, you can dilute any liquid that seeps out of your worm bin’s drainage holes and give your plants a sip.
  • Store them for later use. Make sure to store your vermicompost in a non-airtight container, such as a brown paper bag. It will keep for well over a year in this manner. (If you store it in an airtight container, you will be risking mold and other harmful bacteria growing in there as the organic matter continues to break down in storage).

Leave a comment

Filed under composting, DIY, Gardening, vermicompost

Dedication

When I was a little kid I never gave one thought to my health. I was far too busy begging for candy and “jumping off the walls”, as my dad used to say, after getting my sugar fix. My energy meter was always at capacity and the world was uncharted territory; it demanded exploration and I had plenty of drive for adventure. Another thing I had was my health. But that didn’t even faze me, then.

It took many sunsets before it dawned on me that I was a healthy human being. And it took many cold winters before I could spring to an appreciation for it. Still, it wasn’t until my “inherent” good health became threatened that I realized its true importance and the necessity of protecting it.

At age 24, my health’s predator is Endometriosis. In short, Endometriosis, or “endo”, is a hormonal and immune disease that affects women during their reproductive years. It causes abnormal abdominal growths and lesions in such a cunning manner that it can sink its teeth in for many years without revealing any signs or symptoms. In my case, it has an appetite for causing me extreme, debilitating pelvic pain during certain times of the month, which often leaves me curled up in the fetal position groaning in agony. Suffice it to say, it’s not pleasant.

Even less pleasant was the news from my gynaecologist. According to her, this beast can’t ever be slayed. But, lucky for me, it can be tamed. With proper measures I could (likely) stop the endo’s bite from getting worse, and put an end to the pain of my hellish pelvic cramps forever! How? Simple: Just by signing up for a lifetime of birth control pills and heavy duty over-the-counter pain medication. “Easy peasy” was her attitude. Besides, I’d be but one in multiple billions of women who consume birth control and prescription meds daily.

I think I felt even sicker leaving her office that day than I did going in. Her solution to my condition was not one that would lead me to a path of healing, but one that would numb me into ignorant submission. It also indicated that I would be both supportive and reliant on the pharmaceutical industry until my bitter end. I was left in a dizzying state of doubt. I knew there had to be a door number two.

What I didn’t know was how simple it would be to discover, and how wide open that “alternative” door would be. Just as a seed descends upon the soil and finds moisture and sunlight for germination, a vulnerable me looked around myself and found the healing and support that was needed. Its sources were (and still are) my good friend, Alex, who connected me with a naturopath friend who is now healing me; a caring food shop owner who supplies me with organic everything as well as invaluable recipes and knowledge; my social community in Kensington Market who can always be counted on to share health and nutritional advice; online communities and individuals who take the time to make their experiences, expertise and research widely available; my family who have shown nothing but love and have been listening with open minds; and of course, my partner, Danny and his family, who support me in every way I can think of.

This natural path to recovery I am currently travelling has inspired me to become deeply aware of the connection between health, community, food and environment. Their maintenance is of immense importance to humans and all other life on earth, and I would not have reached such a profound understanding of this now if it weren’t for my recent experiences and the people mentioned above.

So, this blog is dedicated to all of you; for shaking up my wild roots, and in hopes that we all become creative cultivators in this great big globe of a garden.

Leave a comment

Filed under personal